Adding a LoRa IoT device in ChirpStack
The Internet of Things (IoT) has revolutionized the way we collect, transmit, and process data from a wide range of applications. LoRa (Long-Range) technology has emerged as a popular choice for building low-power, long-range wireless IoT networks.
ChirpStack is one of the powerful open-source LoRaWAN software that provides the infrastructure for managing, collecting LoRa IoT devices’ data from the gateway and sending it to any client’s desired visualization software.
RENU is currently one of the providers of this service in Uganda, with over 6 LoRAWAN gateways, and more than 12 sensors connected in different regions.
In this blog, we’ll explore the process of adding a LoRa IoT device to ChirpStack, step by step.
Before diving into the setup, a user needs to first confirm that they have the following:
- A LoRaWAN Gateway: A user needs to confirm that there exists a LoRa gateway within the region they are deploying their sensor. This gateway is responsible for sending information between the IoT devices and the ChirpStack server.
- ChirpStack Server: A user must also have a ChirpStack account onto which the gateway is also registered. This is best determined by contacting your provider.
- A LoRa IoT device: This can be any compatible LoRaWAN device, such as a sensor, tracker, etc that operates in the same frequency band as the gateway. Confirm this with your provider as well.
Procedures of adding LoRa IoT device to ChirpStack.
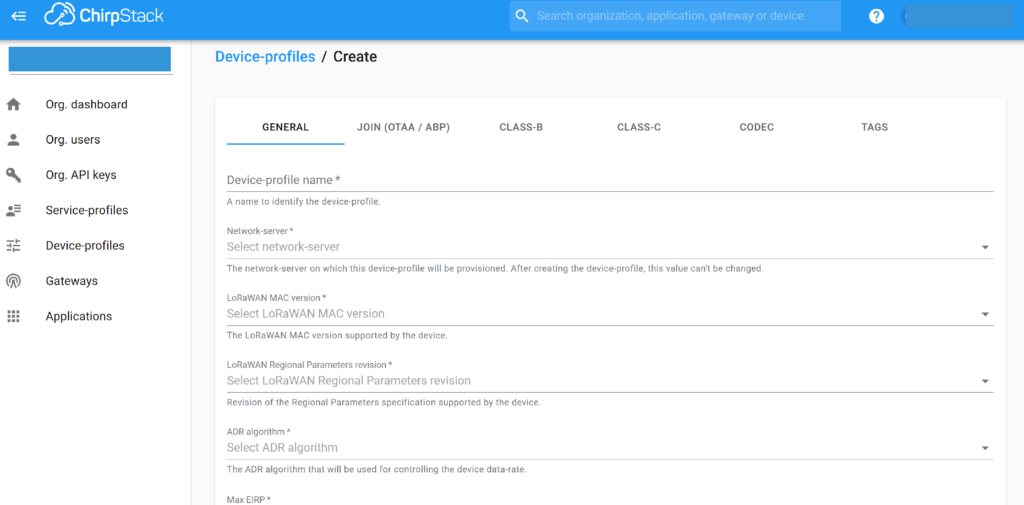
Log into your ChirpStack account and click “Device-profiles”. A device-profile contains the capabilities of your device. For example if the device uses Activation By Personalization (ABP) or Over-The-Air Activation (OTAA) for activation, which LoRaWAN version and Regional Parameters revision is implemented by the device, among others, all of which should be provided in the device manual. It is a good practice to create separate device-profiles for different types of devices.
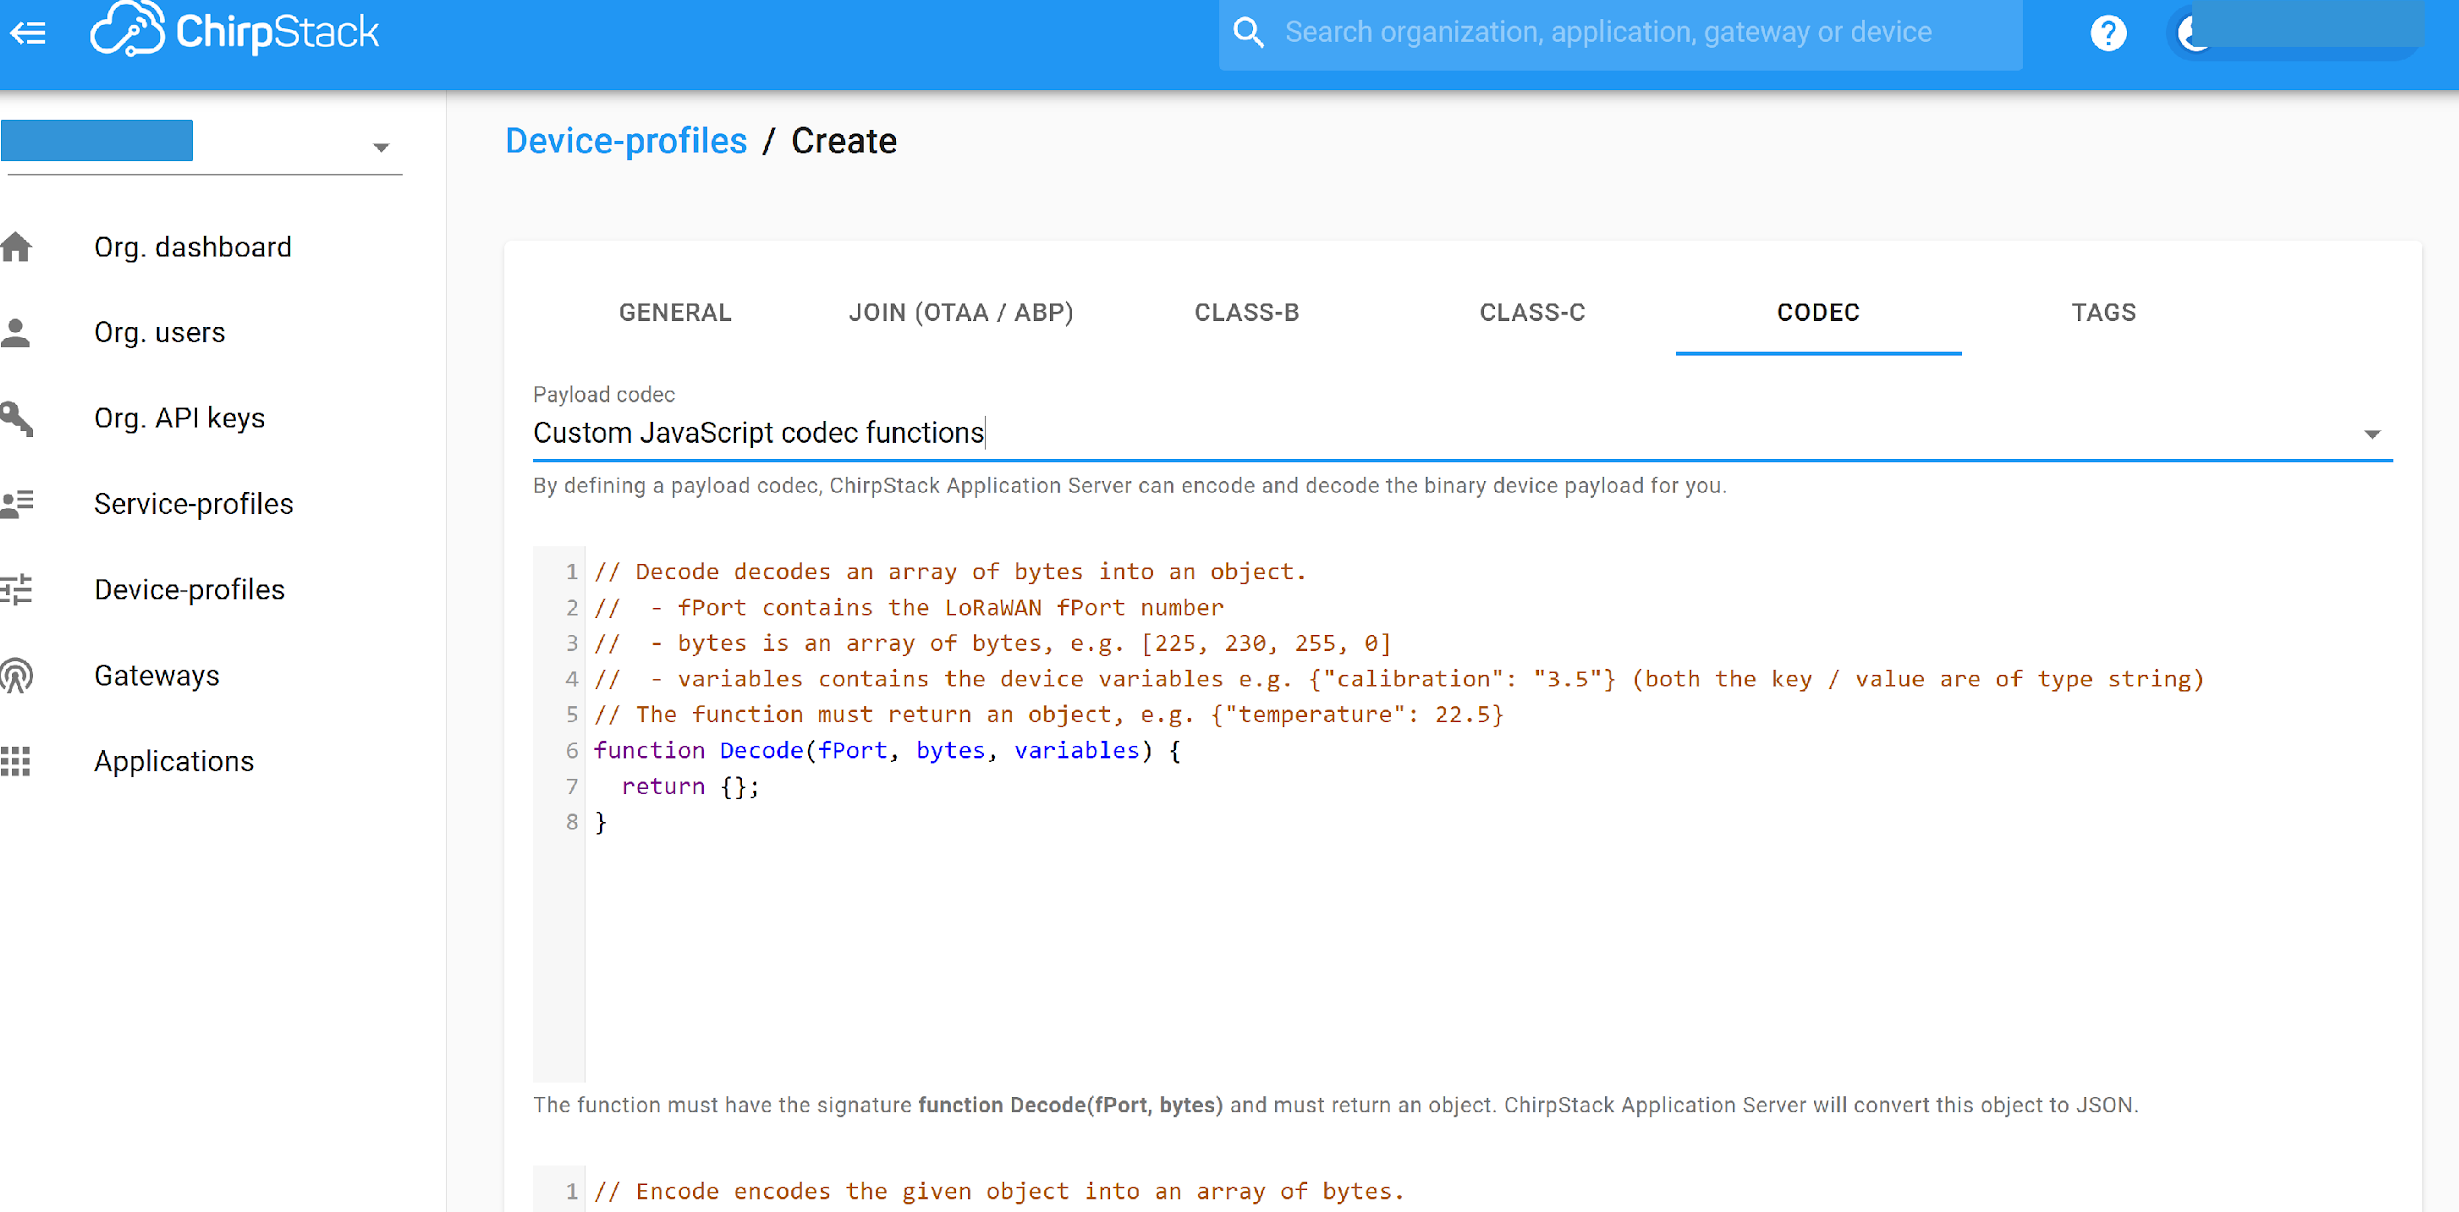
In the device-profile, functions for decoding the devices payloads can also be added under the CODEC sub section
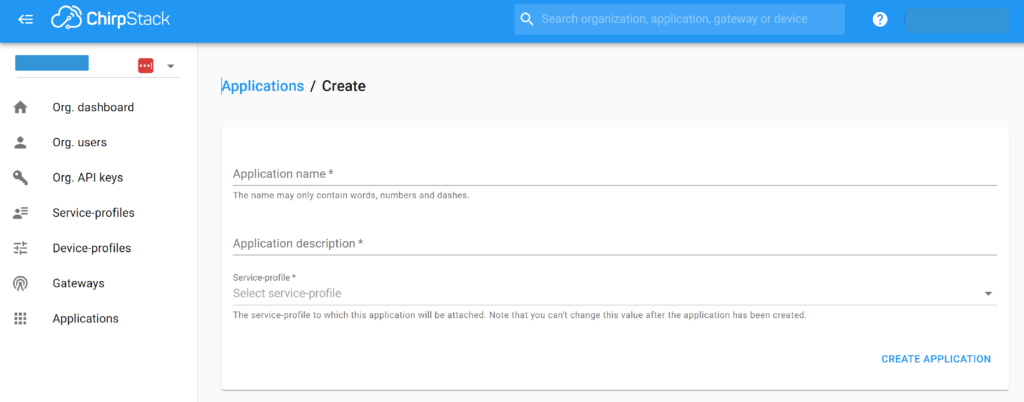
Click “Application” and create a new application to which devices will be added. Devices are grouped by applications based on the parameters of the sensors for example temperature sensors under one application and soil moisture sensors under another. If an application for your sensor type already exists, skip this step;
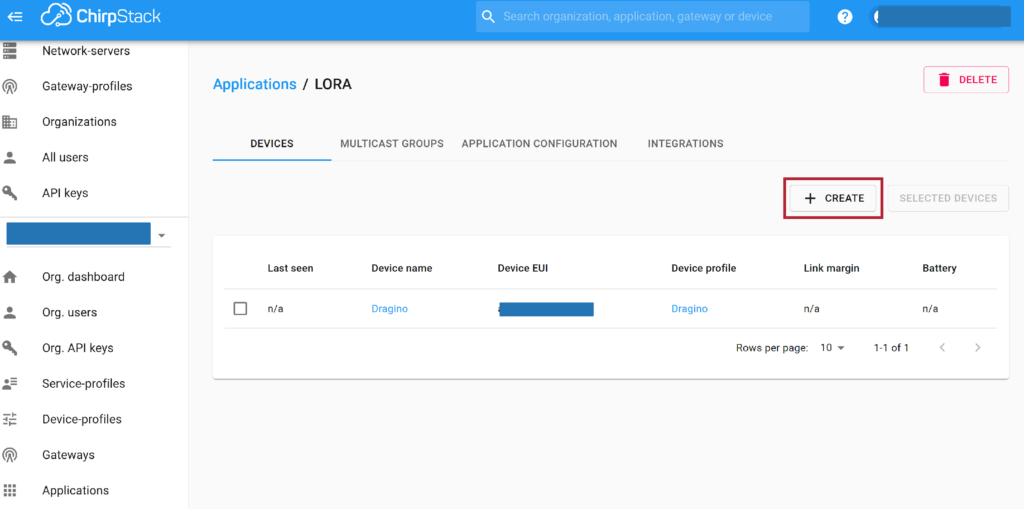
Inside the application, navigate to the “Devices” tab and click on “Create.”
Fill in the device details including DevEUI (Device EUI) and the Device_profile associated with the particular device type which are the two compulsory fields.
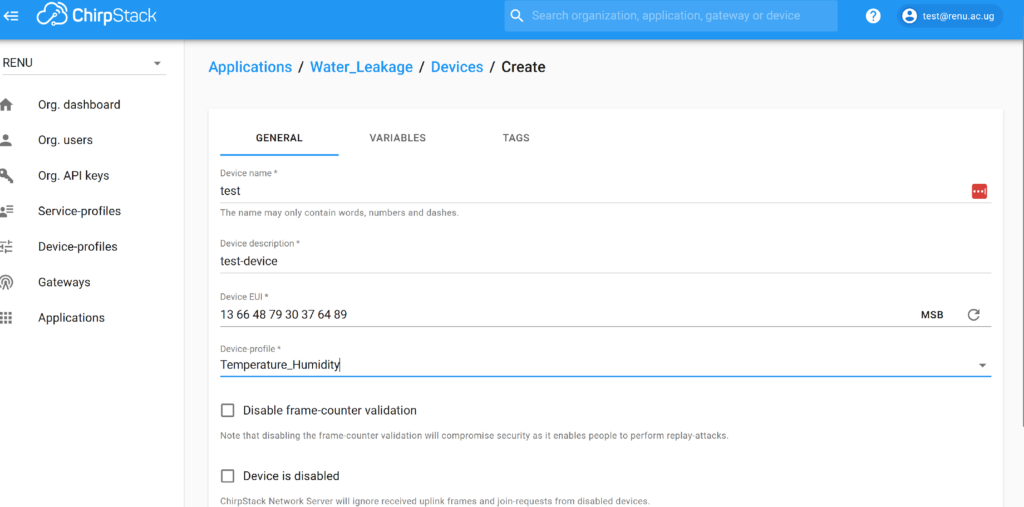
On clicking “create device”, depending on whether the device-profile was configured for OTAA or ABP, the next page will prompt you to enter the device root-keys (OTAA) or device session-keys (ABP);

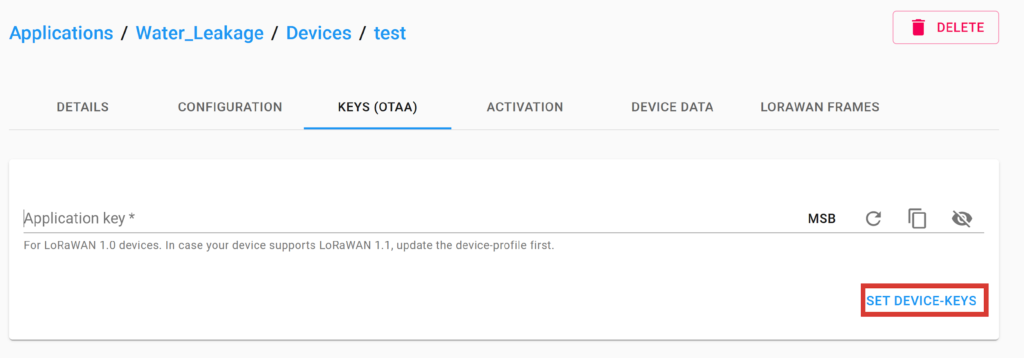
If the Device-profile is configured with OTAA, enter the device application key and it will use this for activation in the Chirpstack join-server . Click “set device keys” and the device will be added to ChirpStack
Validate
After adding your LoRaWAN device to ChirpStack, confirm that your device is activated and that it can send data. This is achieved by;
- Selecting the device in the ChirpStack web-interface,
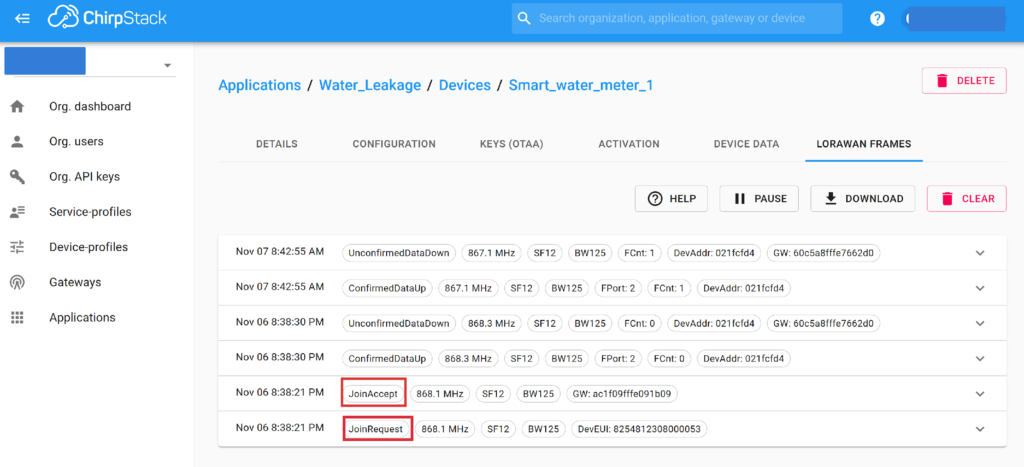
- Navigating to the LoRaWAN frames tab. In case of an OTAA device, you should first see a JoinRequest followed by a JoinAccept message.
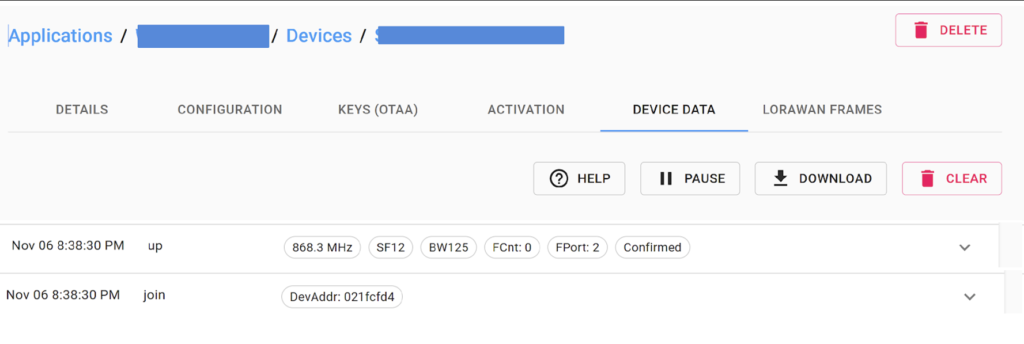
- When the device sends its first data payload, you should also see a Join and Up event in the Device data tab.
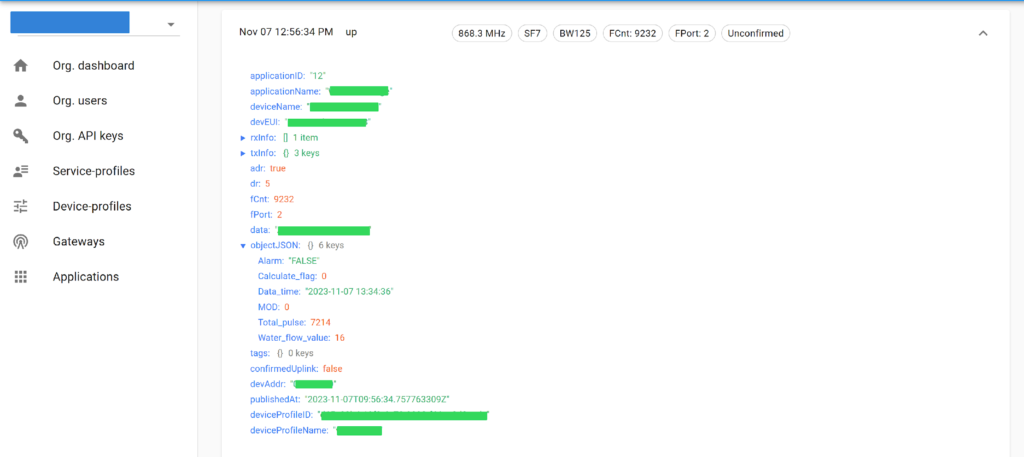
- When you maximize the up event, you should be able to see your decoded data
Conclusion
Adding a LoRa IoT device to ChirpStack is a crucial step in building your IoT network. ChirpStack’s flexibility and open-source nature makes it an excellent choice for managing LoRaWAN devices.
Once your device is successfully registered and configured, you can start collecting valuable data from your IoT sensors and devices for visualization, analysis and decision making.