Creating a Pipeline (CI/CD) on GitLab using Docker on an Ubuntu Server.
Creating a Pipeline (CI/CD) on GitLab, using Docker on an Ubuntu Server.
Introduction:
Continuous Integration (CI):
Continuous Integration is the practice of frequently and automatically integrating code changes from multiple contributors into a shared repository. Developers regularly submit their code changes, which are then automatically built, tested, and integrated into the main codebase. This helps identify and address integration issues early in the development process.
Continuous Delivery (CD):
Continuous Delivery is an extension of CI and focuses on automating the delivery of software to various environments, such as testing, staging, and production. The goal is to ensure that the software is always in a deployable state, allowing for reliable and efficient releases. CD includes automation of testing, deployment, and monitoring, enabling rapid and consistent software delivery.
Docker:
Docker is a technology that packages applications and all their necessary components into self-contained containers, making it easy to develop, test, and run applications consistently across different environments. It simplifies application management and promotes consistency and portability.
Step One: Create a GitLab Project and Repository
1. Start by creating a gitlab account in case you do not have any. If you already have an account, Login. To create an account, go here.
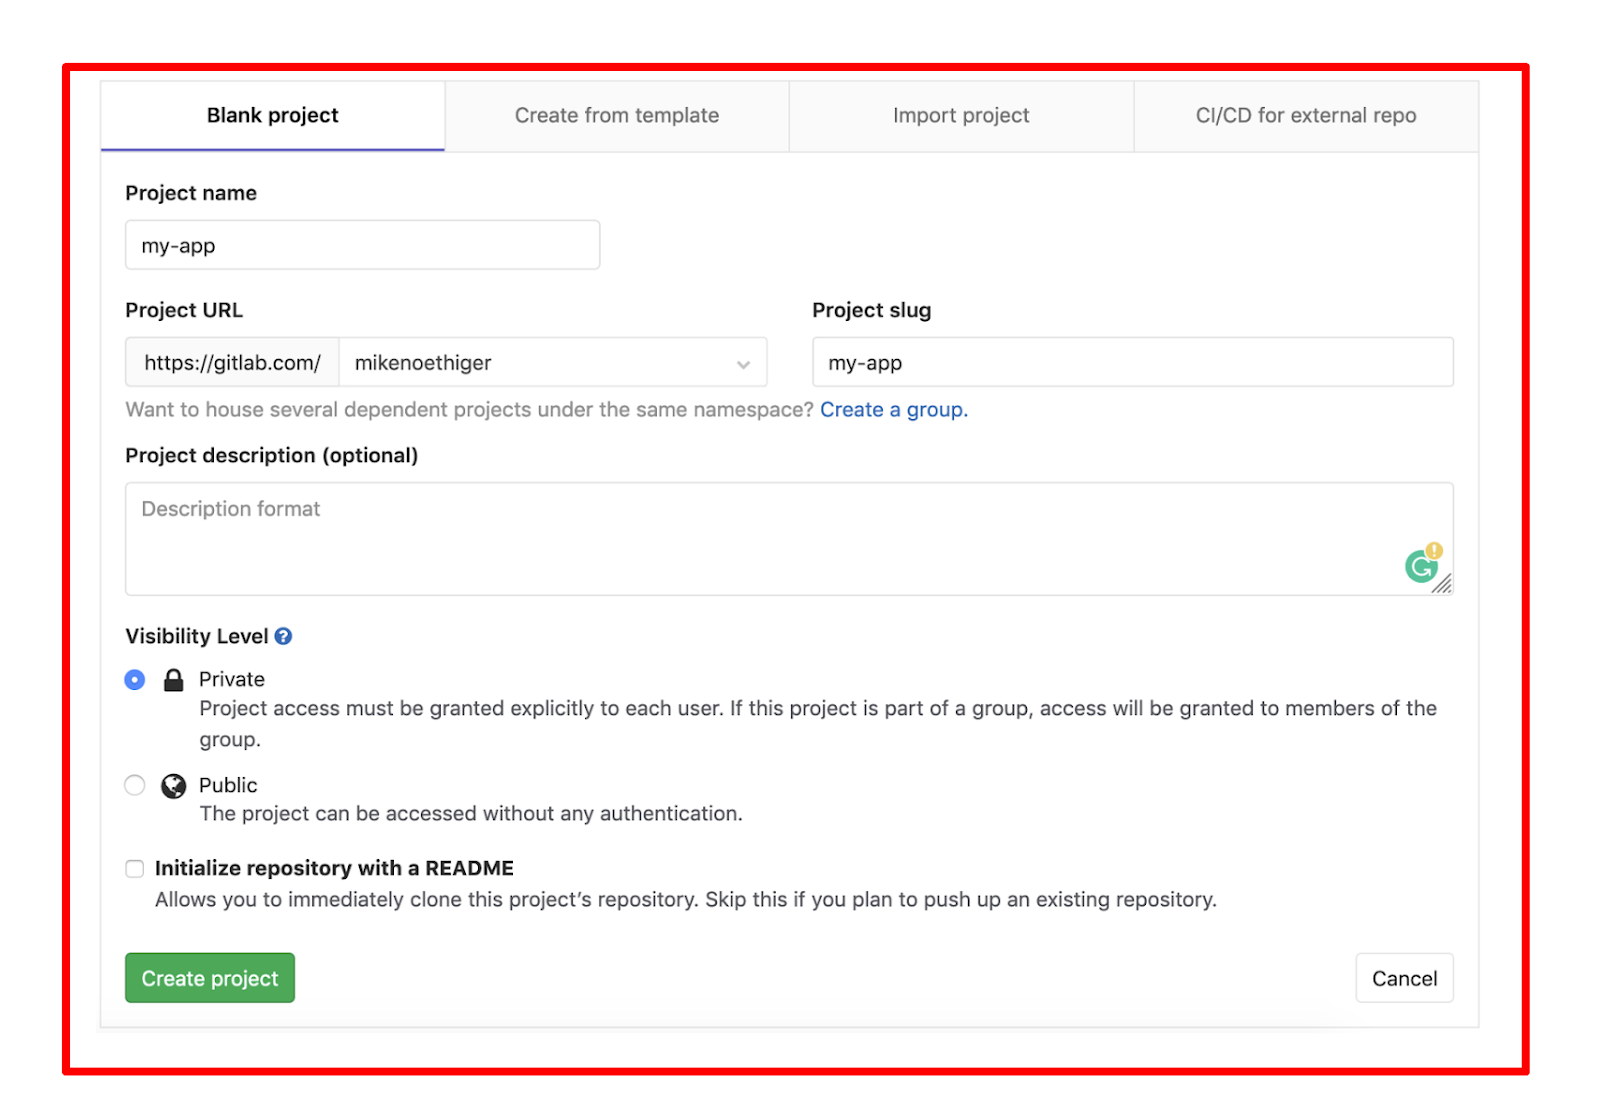
2. Create a new Project.
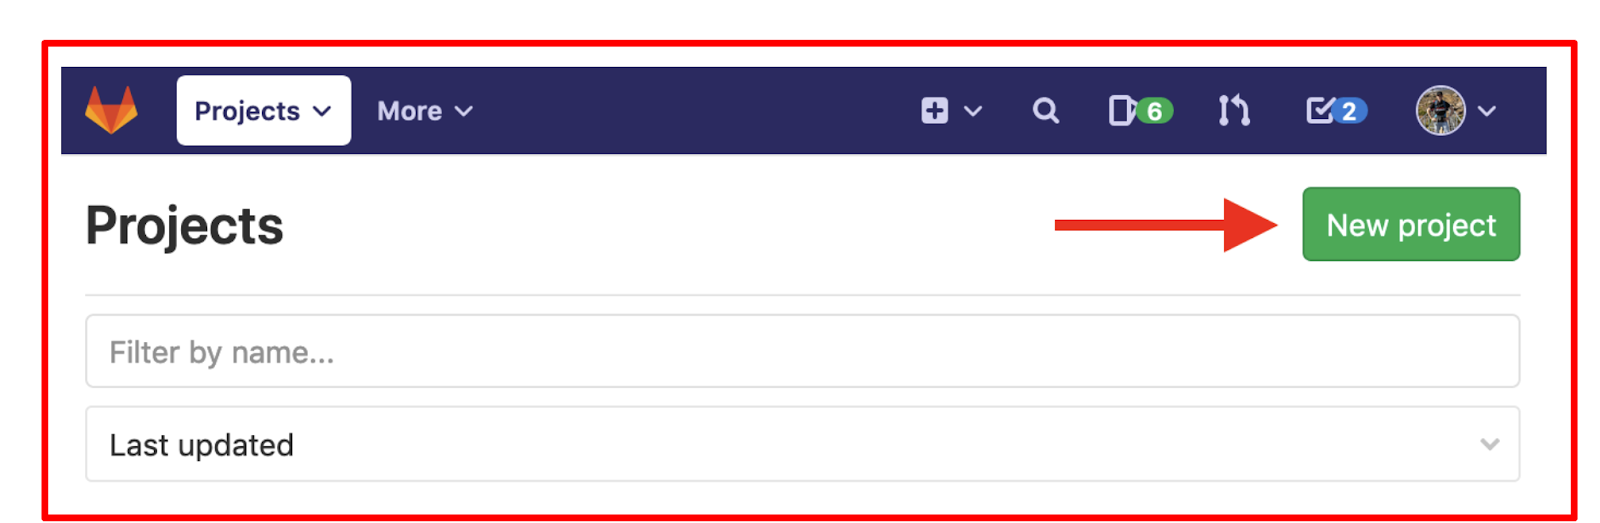
- Give it a proper Project name.
- Optionally add a Project description.
- Make sure to set the Visibility Level to Private or Public depending on your requirements.
- Finally click Create project
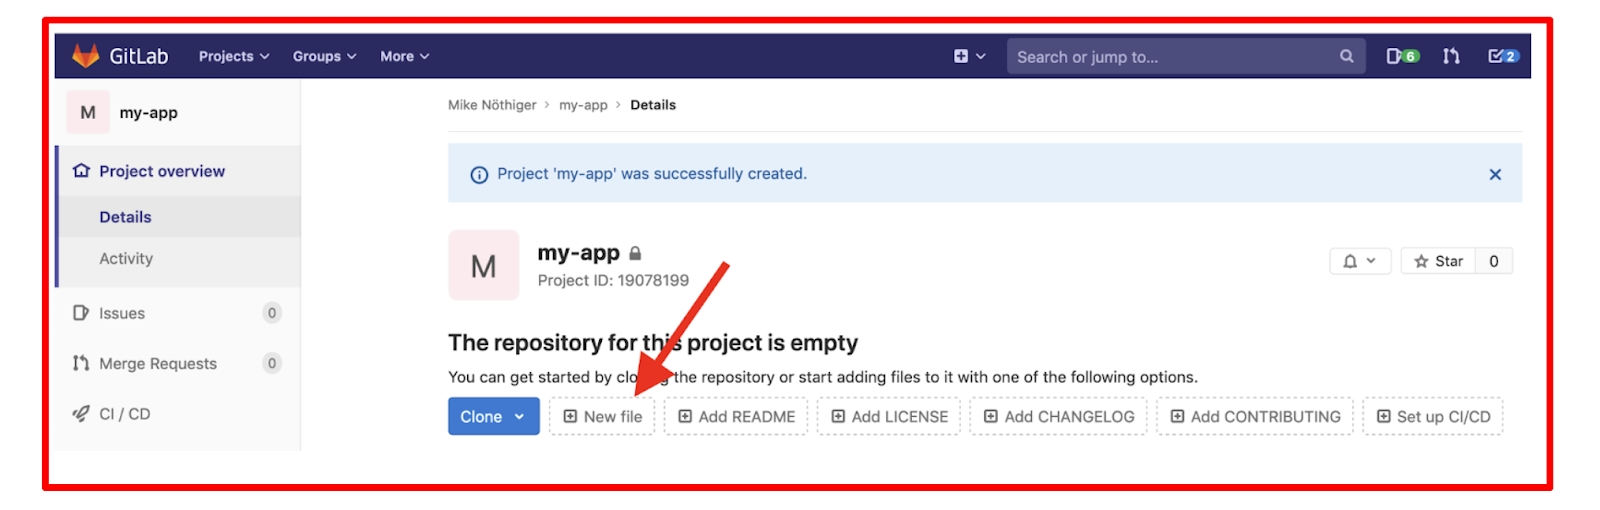
3. You will be redirected or the project page will open.
Create a HTML file this file will be copied into an Nginx Docker image, which in turn you’ll deploy to the server.
- Click New file.
Set the File name to index.html and add the following HTML to the file body

- Click Commit changes at the bottom of the page to create the file.
Note: This HTML will produce a blank page with one headline showing My Personal Website when opened in a browser.
4. Create a Docker File
- Dockerfiles are recipes used by Docker to build Docker images.
- Create a Dockerfile to copy the HTML file into an Nginx image.
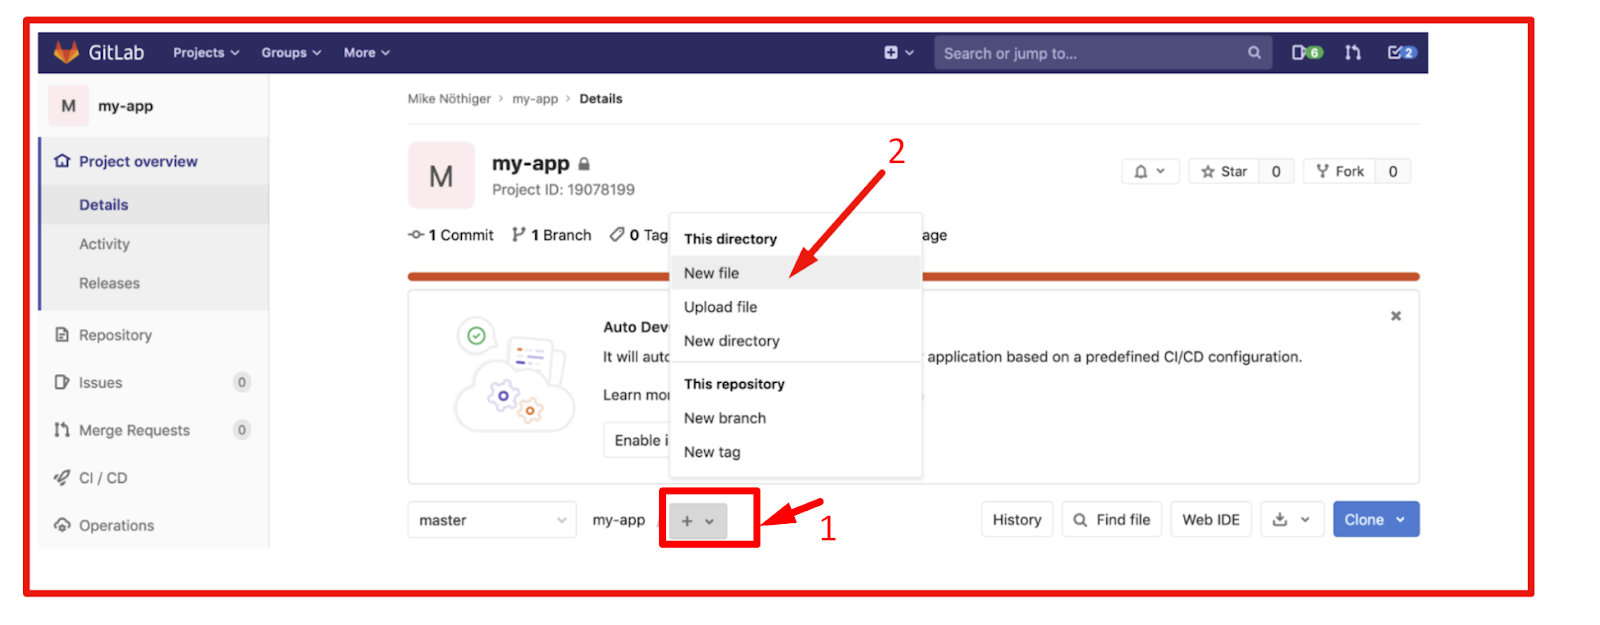
Go back to the Project’s overview page, click the + button and select the New file option.
5. Set the File name to Dockerfile and add these instructions to the file body.
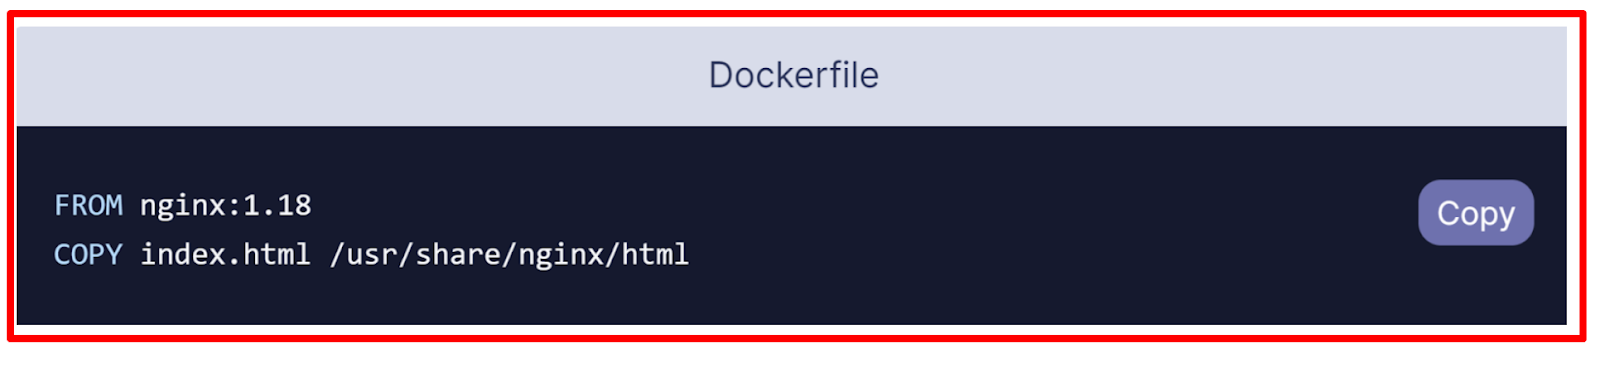
About the Dockerfile.
The FROM instruction specifies the image to inherit from in this case the nginx:1.18 image. 1.18 is the image tag representing the Nginx version. The nginx:latest tag references the latest Nginx release, but that could break your application in the future, which is why fixed versions are recommended.
The COPY instruction copies the index.html file to /usr/share/nginx/html in the Docker image. This is the directory where Nginx stores static HTML content.
Click Commit changes at the bottom of the page to create the file.
In the next step, you’ll configure a GitLab runner to keep control of who gets to execute the deployment job.
Step Two: Register the GitLab Runner
In order to keep track of the environments that will have contact with the SSH private key, you’ll register your server as a GitLab runner.
In your deployment pipeline you want to log in to your server using SSH. To achieve this, you’ll store the SSH private key in a GitLab CI/CD variable.
For each pipeline, GitLab uses runners to perform the heavy work, that is, execute the jobs you have specified in the CI/CD configuration. That means the deployment job will ultimately be executed on a GitLab runner, hence the private key will be copied to the runner such that it can log in to the server using SSH.
1. Start by logging in to your server:

2. Install the gitlab-runner service, by adding the official GitLab repository. Download and inspect the install script:

3. Run the installer

Below is the expected output.
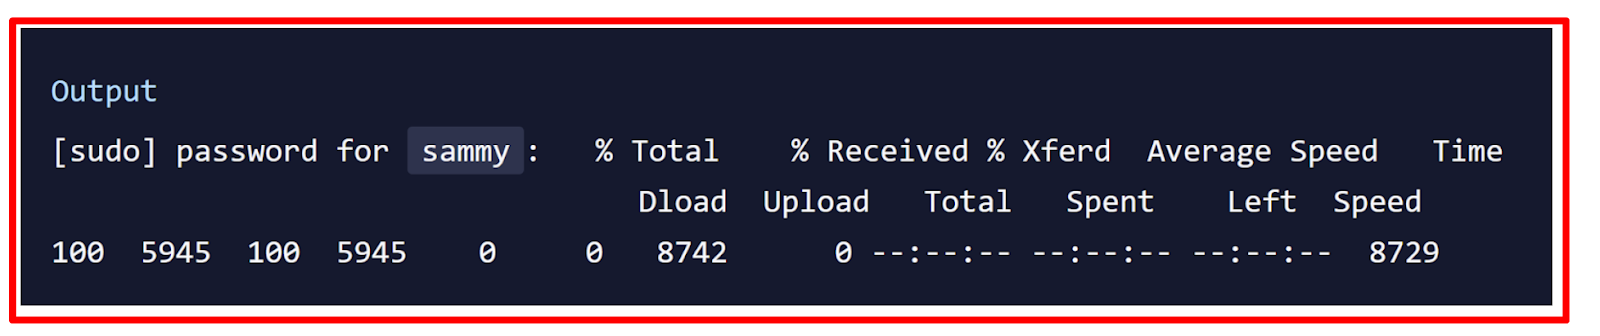
When the curl command finishes, you will receive the following message.

4. Install the gitlab-runner service.

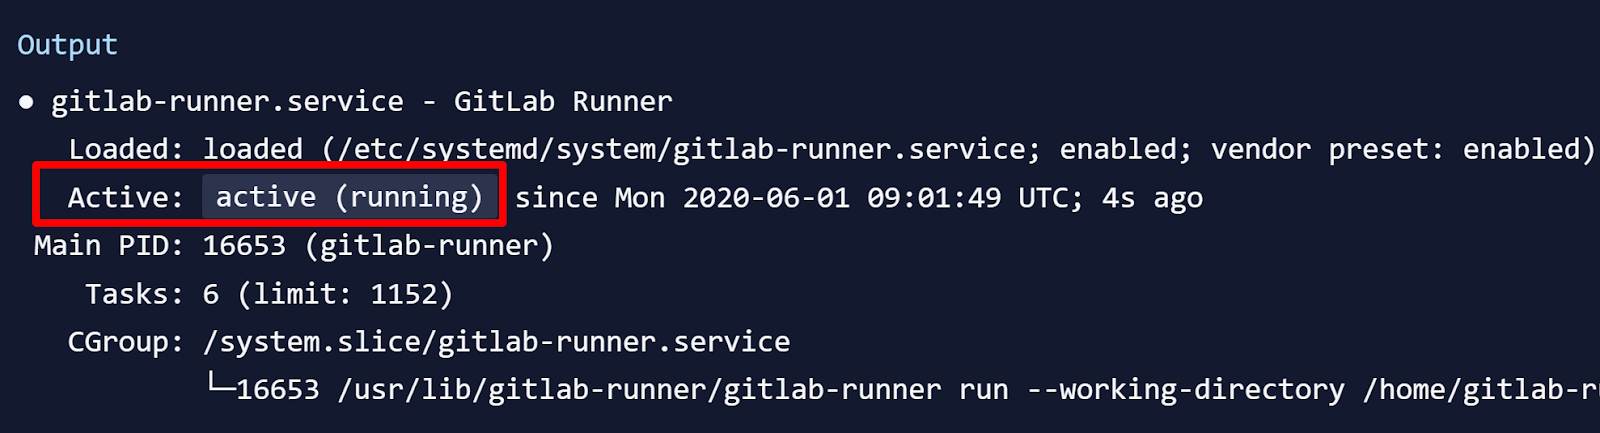
5. Verify the installation by checking the service status.

You will have active (running) in the output.
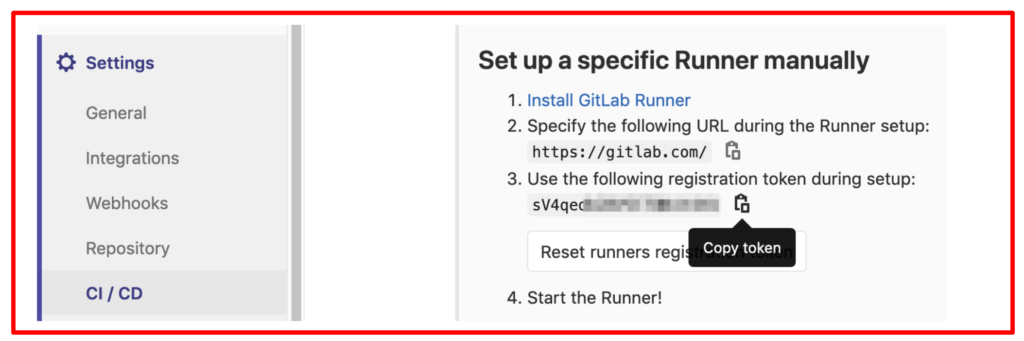
6. To register the runner, you need to get the project token and the GitLab URL:
- In your GitLab project, navigate to Settings > CI/CD > Runners.
In the “Set up a specific Runner manually” section, you’ll find the registration token and the GitLab URL. Copy both to a text editor. They will be referred to as https://your_gitlab.com and project_token.
7. Log Back to your server terminal, register the runner for your project created on gitlab

The command options can be interpreted as follows:
–n executes the register command non-interactively
—url is the GitLab URL you copied from the runners page in GitLab.
—registration-token is the token you copied from the runners page in GitLab.
—executor is the executor type. docker executes each CI/CD job in a Docker container
—description is the runner’s description, which will show up in GitLab.
—docker-image is the default Docker image to use in CI/CD jobs.
—tag-list is a list of tags assigned to the runner.
—docker-privileged executes the Docker container created for each CI/CD job in privileged mode.
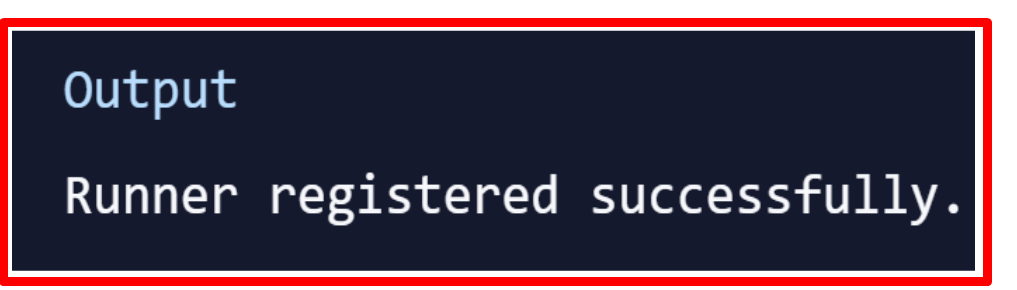
After executing the gitlab-runner register command, you will receive the following output.
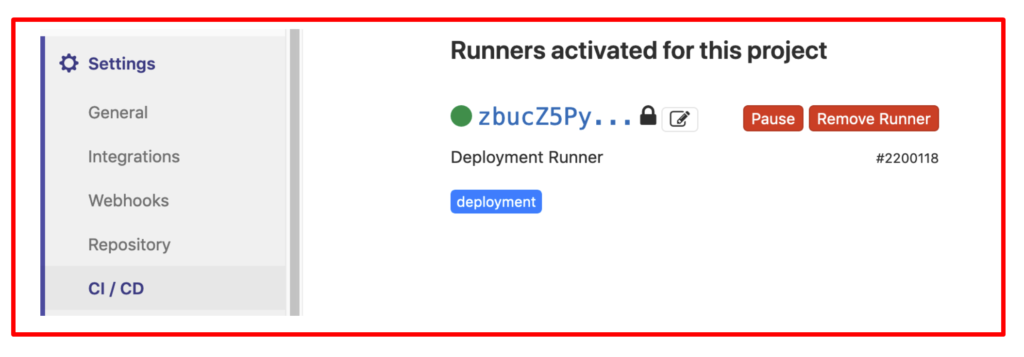
Verify the registration process by going to Settings > CI/CD > Runners in GitLab, where the registered runner will show up.
Step three : Creating a Deployment User.
We need to create a user that is dedicated for the deployment task. You will later configure the CI/CD pipeline to log in to the server with that user.
- On your server, create a new user:

You’ll be guided through the user creation process. Enter a strong password and optionally any further user information you want to specify. Finally confirm the user creation with Y.

This permits the deployer (created user) to execute the docker command, which is required to perform the deployment.
Step Four: Setting Up an SSH Key.
Create an SSH key for the deployment user. GitLab CI/CD will later use the key to log in to the server and perform the deployment routine.
Switch to the newly created deployer user for whom we shall generate the SSH key.

You’ll be prompted for the deployer password to complete the user switch.To summarize, run the following command and confirm both questions with ENTER to create a 4096-bit SSH key and store it in the default location with an empty passphrase:

To authorize the SSH key for the deployer user, you need to append the public key to the authorized_keys file.

Step Five: Storing the Private Key in a GitLab CI/CD Variable
You are going to store the SSH private key in a GitLab CI/CD file variable, so that the pipeline can make use of the key to log in to the server.
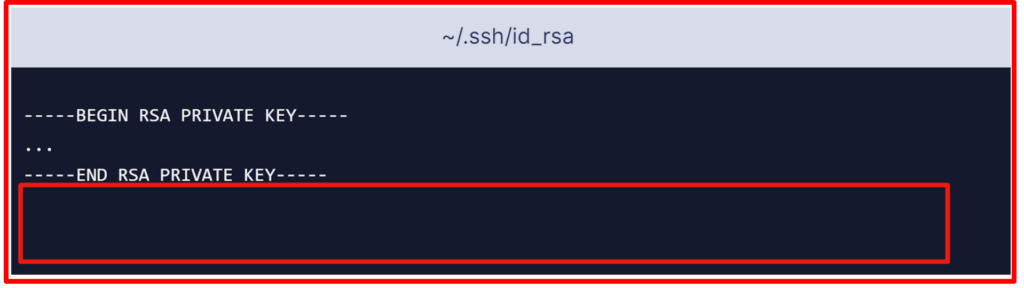
- Start by showing the SSH private key and copy the output on the clipboard.

Make sure to add a line break after —–END RSA PRIVATE KEY—–:
- Now navigate to Settings > CI / CD > Variables in your GitLab project and click Add Variable. Fill out the form as follows:
Key: ID_RSA
Value: Paste your SSH private key from your clipboard (including a line break at the end).
Type: File
Environment Scope: All (default)
Protect variable: Checked
Mask variable: Unchecked
A file containing the private key will be created on the runner for each CI/CD job and its path will be stored in the $ID_RSA environment variable.
- Create another variable with your server IP. Click Add Variable and fill out the form as follows:
Key: SERVER_IP
Value: your_server_IP
Type: Variable
Environment scope: All (default)
Protect variable: Checked
Mask variable: Checked
- Finally, create a variable with the login user. Click Add Variable and fill out the form as follows:
Key: SERVER_USER
Value: deployer
Type: Variable
Environment scope: All (default)
Protect variable: Checked
Mask variable: Checked
You have now stored the private key in a GitLab CI/CD variable, which makes the key available during pipeline execution. In the next step, you’re moving on to configuring the CI/CD pipeline.
Step six: Configuring the .gitlab-ci.yml File
You are going to configure the GitLab CI/CD pipeline. The pipeline will build a Docker image and push it to the container registry. GitLab provides a container registry for each project.
You can explore the container registry by going to Packages & Registries > Container Registry in your GitLab project (read more in GitLab’s container registry documentation.) The final step in your pipeline is to log in to your server, pull the latest Docker image, remove the old container, and start a new container.
Now you’re going to create the .gitlab-ci.yml file that contains the pipeline configuration. In GitLab, go to the Project overview page, click the + button and select New file. Then set the File name to .gitlab-ci.yml.
(Alternatively you can clone the repository and make all following changes to .gitlab-ci.yml on your local machine, then commit and push to the remote repository.)
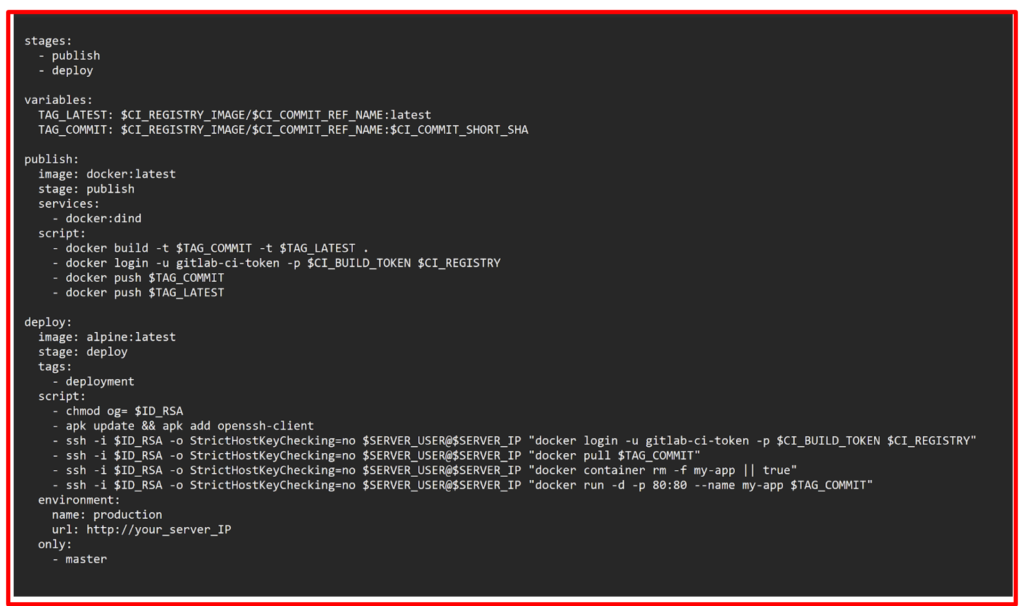
- To begin add the following:

Each job is assigned to a stage. Jobs assigned to the same stage run in parallel (if there are enough runners available). Stages will be executed in the order they were specified. Here, the publish stage will go first and the deploy stage second. Successive stages only start when the previous stage finishes successfully (that is, all jobs have passed). Stage names can be chosen arbitrarily.Following this, add this to your .gitlab-ci.yml file:
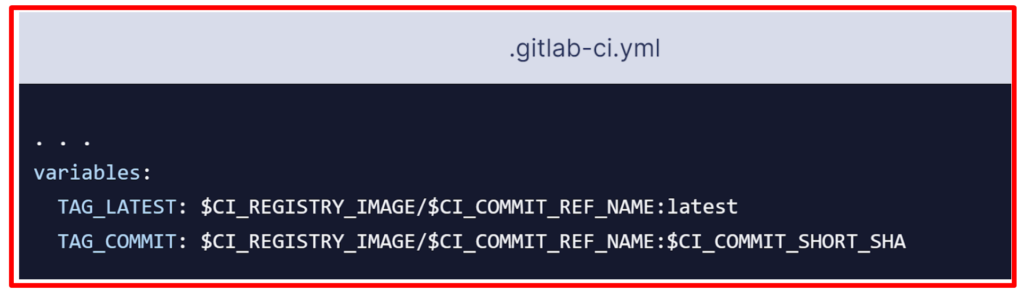
The variables section defines environment variables that will be available in the context of a job’s script section. These variables will be available as usual Linux environment variables; that is, you can reference them in the script by prefixing them with a dollar sign such as $TAG_LATEST. GitLab creates some predefined variables for each job that provide context specific information, such as the branch name or the commit hash the job is working on. Here you compose two environment variables out of predefined variables. They are as below:
CI_REGISTRY_IMAGE: Represents the URL of the container registry tied to the specific project. This URL depends on the GitLab instance. For example, registry URLs for gitlab.com projects follow the pattern: registry.gitlab.com/your_user/your_project.
CI_COMMIT_REF_NAME: The branch or tag name for which project is built.
CI_COMMIT_SHORT_SHA: The first eight characters of the commit revision for which the project is built.
TAG_LATEST will add the latest tag to the image. This is a common strategy to provide a tag that always represents the latest release.
TAG_COMMIT, on the other hand, uses the first eight characters of the commit SHA being deployed as the image tag, thereby creating a unique Docker image for each commit. You will be able to trace the history of Docker images down to the granularity of Git commits. This is a common technique when doing continuous deployments, because it allows you to quickly deploy an older version of the code in case of a defective deployment.
$CI_REGISTRY_IMAGE/$CI_COMMIT_REF_NAME specifies the Docker image base name.
$CI_REGISTRY_IMAGE represents the <registry URL>/<namespace>/<project> part and is mandatory because it is the project’s registry root.
$CI_COMMIT_REF_NAME is optional but useful to host Docker images for different branches.
- Here is a complete .gitlab-ci.yml file and how it should look like.
- Finally click Commit changes at the bottom of the page in GitLab to create the .gitlab-ci.yml file. Alternatively, when you have cloned the Git repository locally, commit and push the file to the remote.
Step Seven: Validating the Deployment.
Now you’ll validate the deployment in various places of GitLab as well as on your server and in a browser.
When a .gitlab-ci.yml file is pushed to the repository, GitLab will automatically detect it and start a CI/CD pipeline. At the time you created the .gitlab-ci.yml file, GitLab started the first pipeline.
Go to CI/CD > Pipelines in your GitLab project to see the pipeline’s status. If the jobs are still running/pending, wait until they are complete.
You will see a Passed pipeline with two green checkmarks, denoting that the publish and deploy job ran successfully.

Let’s examine the pipeline. Click the passed button in the Status column to open the pipeline’s overview page. You will get an overview of general information such as:
- Execution duration of the whole pipeline.
- For which commit and branch the pipeline was executed.
- Related merge requests. If there is an open merge request for the branch in charge, it would show up here.
- All jobs executed in this pipeline as well as their status.
Next click the deploy button to open the result page of the deploy job.
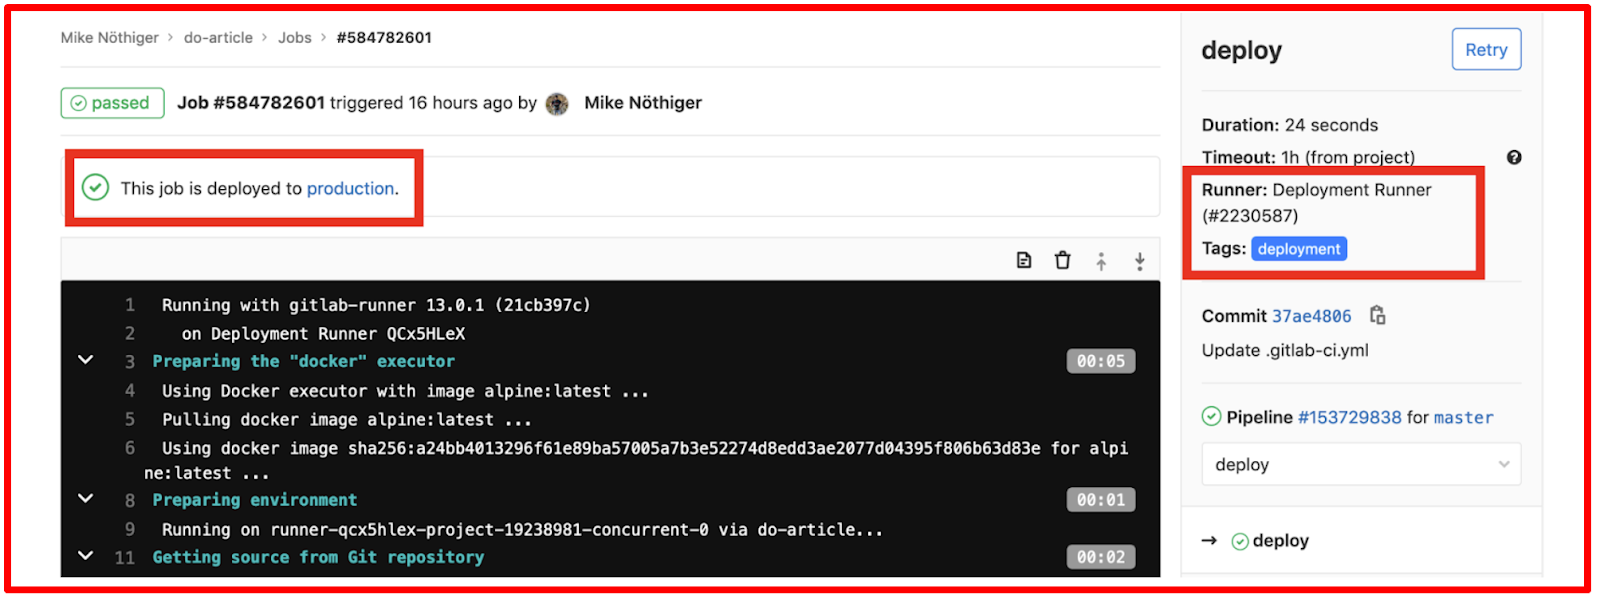
On the job result page you can see the shell output of the job’s script. This is the place to look for when debugging a failed pipeline.
In the right sidebar you’ll find the deployment tag you added to this job, and that it was executed on your Deployment Runner.
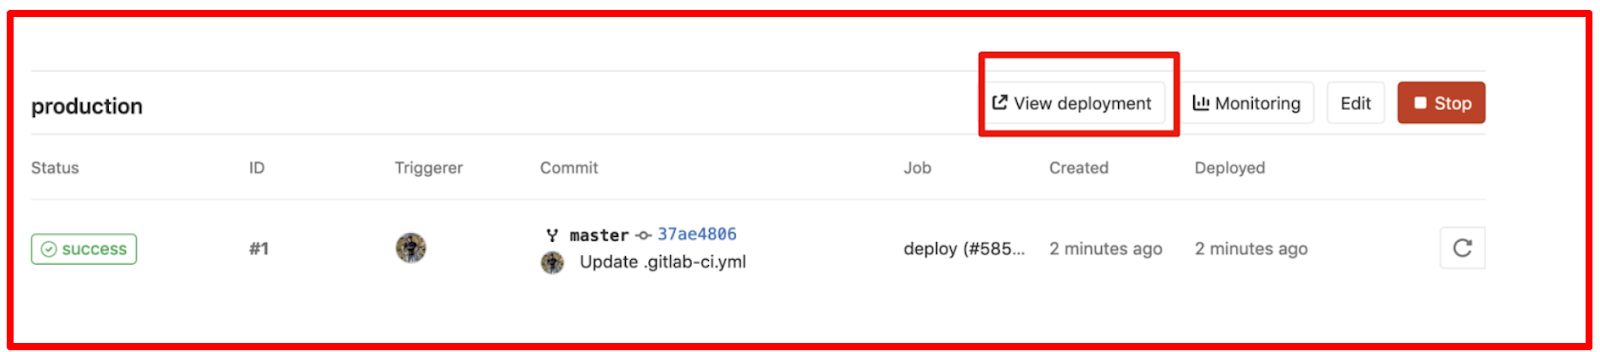
If you scroll to the top of the page, you will find that this job is deployed to production. GitLab recognizes that a deployment took place because of the job’s environment section. Click the production link to move over to the production environment.

Next click the View deployment button, which will open http://your_server_IP in a browser and you should see the My Personal Website headline.
Finally we want to check the deployed container on your server. Head over to your terminal and make sure to log in again, if you have disconnected already (it works for both users, eve and deployer):
Run the command below to list the running containers.

Expected output.

Conclusion:
We have configured a continuous deployment pipeline with GitLab CI/CD, created a small web project consisting of an HTML file and a Dockerfile. Then configured the .gitlab-ci.yml pipeline configuration to:
Build the Docker image.
Push the Docker image to the container registry.
Log in to the server, pull the latest image, stop the current container, and start a new one.
GitLab will now deploy the web page to your server for each push to the repository.
Furthermore we have verified a deployment in GitLab and on your server.