Installing and configuring cacti on ubuntu to monitor the network
In a recent article, http://“https://blog.renu.ac.ug/index.php/2020/06/17/using-Cacti-to-monitor-your-bandwidth-consumption/”, we learnt how to monitor bandwidth consumption using Cacti and the assumption was that your service provider had given you access to their own Cacti tool which they use to monitor your consumption.
In this article, we shall learn how to install and configure Cacti on your own server either on premise or in the cloud.
Our installation focus is going to be on Ubuntu though it could also be installed on Windows which requires installation of a lot more software as compared to Linux. If you want to install on windows use the link below,
With your own Cacti you will be able to monitor not only the bandwidth consumption but also the state (up or down) of your devices and how long they have been in that state.
Before installation there are a few prerequisite that need to be fulfilled;
- Apache; this would be used to display network graphs created by PHP and RRDTool.
- MySQL; This is the database server that stores Cacti information.
- PHP; This is a scripting language for creating graphs using RRDTool.
- PHP-SNMP; This is a PHP extension for access data by PHP.
- RRDTool; This is a database tool for managing and retrieving time series data like CPU load, Network Bandwidth among others.
Installations procedure ;
Update your system
- sudo apt-get update
- sudo apt-get upgrade
- sudo reboot
Check and see if Apache and PHP are installed.
- apache2 –version
- php –version
If they are not installed go on and install them as well as MySQL,
- sudo apt install -y apache2 mariadb-server mariadb-client libapache2-mod-php php-mysql
In addition, for proper working of cacti, some PHP extensions need to be installed.
- sudo apt install -y php-xml php-ldap php-mbstring php-gd php-gmp
Install SNMP and RRDTool as well
- sudo apt install -y snmp php-snmp rrdtool librrds-perl
For better performance it is highly advisable to make a few changes in MySQL,
- sudo vim /etc/mysql/mariadb.conf.d/50-server.cnf
Update;
Collation-server = utf8mb4_unicode_ci
Add at the bottom of the file;
max_heap_table_size = 128M
tmp_table_size = 64M
join-buffer_size = 64M
innodb_file_format = Barracuda
innodb_buffer_pool_size = 512M
innodb_flush_log_at_timeout = 3
innodb_read_io_threads = 32
innodb_write_io_threads =16
innodb_io_capacity = 5000
innodb_io_capacity_max = 10000
Change the timezones in the PHP configurations files below and this is mandatory because the configured zone is checked against the system and MySQL times zones before Cacti is fully installed. Edit the php.ini files below;
- sudo vim /etc/php/7.0/apache2/php.ini
Note: the 7.0 depends on the version of PHP
- sudo vim /etc/php/7.0/cli/php.ini
Updates:
Date.timezone = EAT
Note: Do not forget to uncomment the line by removing ; at the beginning of the line and the value of this depends on your country.
Memory_limit = 512M
Max_execution_time = 60
Restart the MySQL service
- sudo systemctl restart mysql.service
Install Cacti
- wget https://www.Cacti.net/downloads/Cacti-latest.tar.gz
Extract the Cacti archive using tar and copy the the extracted file to /var/www/html directory.
- tar xzvf Cacti-latest.tar.gz
- sudo mv Cacti-1.2.12 /var/www/html/cacti
Note: Cacti-1.2.12 description depends on the cacti version installed
Create a MySQL database
- sudo mysql -u root -p
- create database Cacti;
- exit
Import the default Cacti database
- sudo mysql -u root -p Cacti < /var/www/html/cacti/Cacti.sql
Create a MySQL username and password for Cacti.
- sudo mysql -u root
- grant all privileges on Cacti.* TO Cactiuser@localhost IDENTIFIED BY ‘put here your desired password and take note of it’;
- Flush privileges;
- Exit
Grant the database access to the MySQL.time_zone_name
- sudo mysql -u root mysql < /usr/share/mysql/MySQL_test_data_timezone.sql
Log into MySQL and grant permissions to Cactiuser
- sudo mysql -u root
- GRANT SELECT ON mysql.time_zone_name TO Cactiuser@localhost;Flush privileges;
- Exit
Edit config.php and specify the database type, name, host, user and password for your Cacti configuration.
- sudo vim /var/www/html/cacti/include/config.php
Updates;(these should be similar to the details you used earlier when creating the MySQL username and password)
database_type = “mysql”;
database_default = “Cacti”;
database_hostname = “localhost”;
database_username = “Cactiuser”;
database_password = “Cacti”;
Set the appropriate permissions on Cacti’s directories for graph/log generation.
- cd /var/www/html
- chown -R www-data:www-data *
Edit the crontab file so that Cacti can poll every five minutes
- sudo vim /etc/cron.d/Cacti
Add:
*/5 * * * * www-data php /var/www/html/cacti/poller.php > /dev/null 2>&1
Edit the Apache configuration file.
- sudo vim /etc/apache2/sites-available/Cacti.conf
Add;
Alias /Cacti /var/www/html/cacti
<Directory /var/www/html/cacti>
Options +FollowSymLinks
AllowOverride None
<IfVersion >= 2.3>
Require all granted
</IfVersion>
<IfVersion < 2.3>
Order Allow,DenyAllow from all
</IfVersion>
AddType application/x-httpd-php .php
<IfModule mod_php.c>
php_flag magic_quotes_gpc Off
php_flag short_open_tag On
php_flag register_globals Off
php_flag register_argc_argv On
php_flag track_vars On
# this setting is necessary for some locales
php_value mbstring.func_overload 0
php_value include_path .
</IfModule>
DirectoryIndex index.php
</Directory>
Restart apache service
- sudo systemctl restart apache2
Create a log file for Cacti to write its data
- sudo touch /var/www/html/cacti/log/Cacti.log
- sudo chown -R www-data:www-data /var/www/html/cacti/log
Visit http://<ipaddress>/Cacti and login using admin as the username and password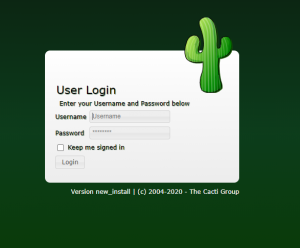
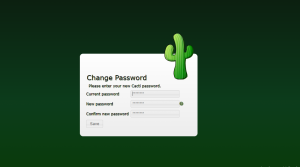
- You will be prompted to change the password after login
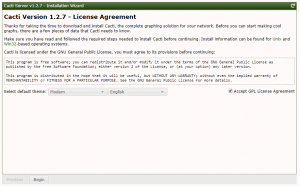
- Accept license agreement and click begin
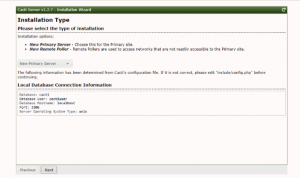
- Select New Primary Server as an installation type for the new installation and then click Next.
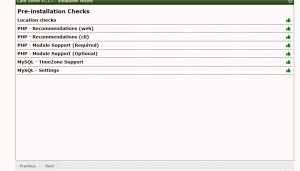
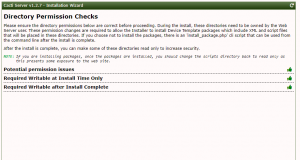
- Cacti will perform a few checks on the configurations if everything is okay click next and if not you will be alerted.
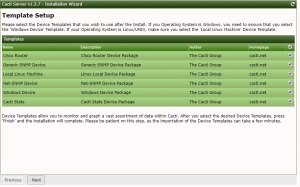
- Click next until you find the page below. Here tick all options and click next.
- On the next pages click next and finish installing
- After installation is complete login with;
Username: Admin
Password: “use the new password”
- After login, the interface below will be displayed.
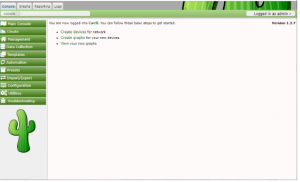
Conclusion
Congratulation, at this point you have Cacti installed on your server and you are ready to monitor devices on your network and by default your server is added to the tool.
REFERENCES AND FURTHER READING;
- https://www.php.net/manual/en/timezones.php
- https://phoenixnap.com/kb/how-to-set-or-change-timezone-date-time-ubuntu
- https://www.tecmint.com/install-cacti-network-monitoring-on-rhel-centos-fedora/
- https://www.cacti.net/downloads/docs/html/unix_configure_cacti.html