There can be a number of reasons for migrating from one mail server to another, the commonest being “running low on disk storage”. Other reasons may include “the need to having a failover mail server” in case of any catastrophic event that may compromise the active email server, among others.
In other words, this same technique can be used to create a clone of your currently running email server to ensure redundancy.
In order to have virtually zero down time, we will proceed as follows :
- Set the DNS TTL Entries pertinent to the mail server to the shortest possible time (Ideally this is done a day before to make sure the ttl propagates accordingly)
- Prepare a fully working new server
- Import all existing domains from the old server.
- Import all existing accounts, passwords, distribution lists, and aliases from the old server
- Move all DNS Pointers and firewall port forwards to the new server (or leave the DNS Pointers as they are, and simply swap the servers’ I.P. Addresses old to new, and new to old. (More about this later)
- Make sure that new mail is arriving on the new server.
- Make sure users are able to connect and use the new server.
- Export Mailbox data from the old server, and import it to the new while the new server is running
1. Preparing the new server
Go ahead and install zimbra on the new server. Make sure to use the same version as that on your old mail server. You can follow the guide here. You will need to setup the new mail server with the same settings as the old server, but with a different IP and domain name.
In case you have more than one domain on your old mail server, create only one main domain on the new mail server as the other domains will be imported automatically during the course of the migration.
Remember that if you intend to install a “letsencrypt” certificate later on (note that this is not covered in this blog), your server name needs to be the same as your http://webmail.domain.com name. It’s commonplace for people to use webmail.domain.com.
Warning : Most of the commands executed during export, and more importantly during import, may take hours. These should be run directly from a console session. If you have absolutely no choice but to run the commands remotely, make sure you use the “screen” command, so that if the connection gets interrupted, you can connect back to your screen, without disrupting any running scripts.
2. The exportation phase
Before we begin the exportation part, we need to make sure we have enough storage space, which can be accessed from both “old” and “new” servers. The old server may have some sufficient space enough for the exportation to be done, but in case it does not, the way to go would be to remote mount an NFS share from the new server (since the new server is technically believed to have sufficient free space), on the old server and use it as the intermediate storage.Other ways include an external usb drive, a network attached storage, etc.
The choice is really up to you. The steps that follow are generic, and assume the intermediate storage is located at /migration/zimbra. If your path is different you will need to modify the scripts accordingly. To keep things organised, we will create separate folders for all the different migration files. Also make sure the path is readable / writable by the Zimbra user. In this case I would recommend:
# mkdir -p /migration/zimbra
# chmod -R 777 /migration/zimbra
# chown  -R zimbra:zimbra  /migration/zimbra
“The commands below are to be run as the Zimbra user”
Step 1. Export all domains
# su - zimbra
# mkdir -p /migration/zimbra/domains
# cd /migration/zimbra/domains
# zmprov gad | tee -a domains.txt
The command should last only a few seconds, depending on the number of domains on the server. A quick cat domains.txt will show us the available domains.
# cat domains.txt
  domain1.com
Step 2. Export all accounts
# mkdir -p  /migration/zimbra/accounts
# cd /migration/zimbra/accounts
# zmprov gaaa | tee -a admins.txt
Again a quick “cat admins.txt” should list the domain admins, the same ones you see during execution of the “tee – a” command.
Next we export all the users.
# zmprov -l gaa | tee -a users.txt
Step 3. Export all account details
# mkdir -p /migration/zimbra/account_details
# cd /migration/zimbra/account_details
# for user in `cat ../accounts/users.txt`; do zmprov ga $user  | grep -i Name: | tee -a $user.txt ; done
Step 4. Export all account passwords
# mkdir -p /migration/zimbra/passwords
# cd /migration/zimbra/passwords
# for user in `cat ../accounts/users.txt`; do zmprov -l ga $user userPassword | grep userPassword: | awk \'{ print $2}\' | tee -a $user.shadow; done
Step 5. Export all distribution lists
# mkdir -p /migration/zimbra/distribution_lists
# cd /migration/zimbra/distribution_lists
# zmprov gadl | tee -a distribution_lists.txt
# for list in `cat distribution_list.txt`; do zmprov gdlm $list > $list.txt ;echo $list; done
Step 6. Export all aliases
# mkdir -p /migration/zimbra/aliases
# cd /migration/zimbra/aliases
# for user in `cat ../accounts/users.txt`; do zmprov ga  $user | grep zimbraMailAlias | awk \'{print $2}\' | tee -a $user.txt ;echo $i ;done
This process will take some time, depending on the number of accounts. Since most accounts won’t actually have aliases, we will end up with a lot of unnecessary empty text files, which we will delete using
# find /migration/zimbra/aliases -type f -empty | xargs -n1 rm -v
So far we have exported everything from our old mail server, except the mailboxes themselves and any filters the users might have created.
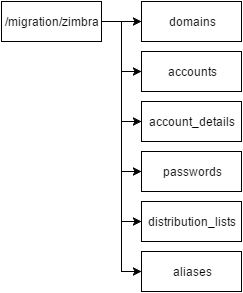
We also have the following backup folder structure :-
Step 7. Exporting mailbox data
The next process will be the most time consuming of all the processes. Depending on the amount of data, exporting the data could take as long as a day if not more. Data import will take just as long.
To start the export of mailboxes, make sure to do it via a console or via a “Screen” session.
As the Zimbra user, goto /migration/zimbra and create a directory called mailbox_data.
# su - zimbra
# cd /migration/zimbra
# mkdir mailbox_data
# cd mailbox_data
# for user in `cat ../accounts/users.txt`; do echo Exporting mailbox $user ; zmmailbox -z -m $user getRestURL \'/?fmt=tgz\' > ./$user.tgz ; done
You will start seeing mailboxes being exported, but this will take a while.
In the event that any mailboxes report errors during export, make a note of the problematic accounts, and try to re-export them later, by creating a text file :
/migration/zimbra/accounts/problematic_accounts.txt
and running the following command. The format of the file needs to be exactly like the format inside /migration/zimbra/accounts/users.txt. Use it as reference.
# for user in `cat ../accounts/problematic_accounts.txt`; do echo Exporting mailbox $user ; zmmailbox -z -m $user getRestURL \'/?fmt=tgz\' > ./$user.tgz ; done
Step 8. Exporting email filters for all the accounts
Once the mailbox exportation completes, let’s also export any user filter settings. We need a bash script for this.
Create a new directory called filters, create a file called export_filters.sh.
# mkdir /migration/zimbra/filters
# cd /migration/zimbra/filters
# vim export_filters.sh
# chmod 777 export_filters.sh
paste the script below into it;
#!/bin/bash
mkdir tmp
set -x
clear
for user in `cat ../accounts/users.txt`;
do
    filter=`zmprov ga $user zimbraMailSieveScript > ./tmp/$user`
    sed -i -e 1d ./tmp/$user
    sed \'s/zimbraMailSieveScript: //g\' ./tmp/$user > ./$user;
    rm ./tmp/$user
    echo Export filter for $user
done
\\rm -rf tmp
3. The importation Phase
The first step in the restoration process starts by restoring all domains. If you have already created the main domain on the new server, you can delete it from /migration/zimbra/domains/domains.txt
The next part assumes that the data we just exported in the above section is available or copied (in the same directory structure) on the new server.
If you have to copy the data, ensure that you issue a chown -R zimbra:zimbra in /migration/zimbra to make sure, user zimbra has full acess to all the files and directories.
Warning: Any interruption during the execution of these scripts could result in database corruption, hence these commands should be run either from a console or via a screen session.
Step 9. Restore all domains to the new server
Login as zimbra user and issue the following commands :-
# cd /migration/zimbra/domains
# for domain in `cat domains.txt `; do zmprov cd $domain zimbraAuthMech zimbra ;echo $domain ;done
A quick visit to https://youserver-ip:7071 should confirm that the domains have been imported successfully.
Step 10. Restore all accounts and passwords
Restoring accounts and passwords requires the use of a small script. Restoring each account will entail creating the account with a temporary password, and restoring the old password in another step.
create a directory called “scripts”, and cd to it, and open your favourite editor to create a file called restore_accounts.sh.
# mkdir -p /migration/zimbra/scripts
# cd /migration/zimbra/scripts
# vim restore_accounts.sh
Paste this script to your file and save it.
#!/bin/bash
PASSWDS=../passwords
ACCOUNT_DETAILS=../account_details
USERS=../accounts/users.txt
for i in `cat $USERS`
   do
givenName=$(grep givenName: $ACCOUNT_DETAILS/$i.txt | cut -d : -f2)
displayName=$(grep displayName: $ACCOUNT_DETAILS/$i.txt | cut -d : -f2)
shadowpass=$(cat $PASSWDS/$i.shadow)
zmprov ca $i TeMpPa55^() cn $givenName displayName $displayName givenName $givenName
zmprov ma $i userPassword $shadowpass
   done
Make the script executable chmod 777 restore_accounts.sh, and execute it.
# chmod 777 restore_accounts.sh
# ./restore_accounts.sh
The user accounts, and their relative passwords are now being imported into the new server. You might get an error every now and again saying :-
ERROR: account.ACCOUNT_EXISTS (email address already exists: admin@domain.com, at DN: uid=admin,ou=people,dc=domain,dc=com)
This basically means that the account which is currently being imported already exists. This is true for admin, anti spam and anti virus accounts (you may wish to delete these accounts from /migration/zimbra/accounts/users.txt. Also keep in mind that after the script runs, the admin password of the new server will now be the same as the admin password of the old server . The password you have created during the installation will be overwritten (unless you delete admin@domain.com from users.txt)
Step 11. Restore distribution lists
Go to /migration/zimbra and execute the following command to re-create the distribution lists.
#for lists in `cat distribution_lists/distribution_lists.txt`; do zmprov cdl $lists ; echo $lists -- done ; done
Next, we need to populate the lists, using a very short bash script
Go to /migration/zimbra/distribution_lists and create the script named restore_dist_lists.sh.
Paste the following into the script and save it.
#!/bin/bash
for list in `cat distribution_lists.txt`
do
    for mbmr in `grep -v \'#\' ./$list.txt | grep \'@\'`
    do
        zmprov adlm $list $mbmr
        echo  $mbmr has been added to $list
    done
done
Make the script executable, and run it.
# chmod 777 restore_dist_lists.sh
# ./restore_dist_lists.sh
You will see members being added to the various distribution lists, as the script goes thru the lists. Depending on the number of distribution lists, and the number of members in each list, this script could take a few minutes to finish.
Step 12. Restore all aliases
Create a new script called restore_aliases.sh, paste the code below into it, and make it executable.
# cd /migration/zimbra/aliases
# vim restore_aliases.sh
Then, paste the code below into it;
#!/bin/bash
echo Processing User accounts
for user in `cat ../accounts/users.txt`
do
    echo $user
    if [ -f ./$user.txt ]; then
        for alias in `grep \'@\' ./$user.txt`
        do
            zmprov aaa $user $alias
            echo $user ALIAS $alias - Restored
        done
     fi
done
echo Processing Admin accounts for user in `cat ../accounts/admins.txt` do echo $user if [ -f ./$user.txt ]; then for alias in `grep \'@\' ./$user.txt` do zmprov aaa $user $alias echo $user ALIAS $alias - Restored done fi done
Make the script executable;
# chmod 777 restore_aliases.sh
# ./restore_aliases.sh
Step 13. Importing mailboxes
After migrating the exported mailboxes to the new mail server, go to the /migration/zimbra/mailbox_data directory.
# cd /migration/zimbra/mailbox_data
# for mailbox in `cat ../accounts/users.txt`; do zmmailbox -z -m $mailbox postRestURL /?fmt=tgz&resolve=skip ./$mailbox.tgz ; echo $mailbox - done ; done
This process will also take quite a while to complete, the users may use the server freely during the import. When their turn arrives, they will start seeing their mailbox starting to get populated with the emails they left behind on the old server.
Note:
If you get any errors, you can re-export, and re-import the problematic accounts by manipulating /migration/zimbra/accounts/users.txt accordingly and re-running the export command. If you get any “broken pipe” type errors it probably means that the tar archive got corrupted during the transfer for some reason or other, and is essentially incomplete.
Step 14. Importing mail filters
Finally let’s import the user filters.
With the mail filters successfully transferred to the new mail server, go to /migration/zimbra/filters, and create a file called import_filters.sh. Paste the script below into it, save and make it executable.
# cd /migration/zimbra/filters
# vim import_filters.sh
# chmod 777 import_filters.sh
Paste the code below into it;
for file in /migration/zimbra/filters/*
    do
        StrFilter=`cat $file`
        Acc=`echo $file | cut -d / -f5`
        su - zimbra -c zmprov ma $Acc zimbraMailSieveScript \'$StrFilter\'
        echo Process filter $Acc
    done
echo All filters have been imported successfully
Step 15. Bring the new server online, and take the old server offline
At this point, we have migrated all the user accounts, their passwords, all the distribution lists, and account aliases. For all intents and purposes, we have a fully working server.
For good measure, let’s restart zimbra services
# zmcontrol restart
Wait for the services to restart, and issue a zmcontrol status.
#zmcontrol status
Host domain.com
amavis Running
antispam Running
antivirus Running
ldap Running
logger Running
mailbox Running
memcached Running
mta Running
opendkim Running
proxy Running
service webapp Running
snmp Running
spell Running
stats Running
zimbra webapp Running
zimbraAdmin webapp Running
zimlet webapp Running
zmconfigd Running
Note:
Log in to the web interface, and check that the number of accounts on the new server is the same as the number of accounts on the old server. There could be a minor discrepancy, if you have used a different domain name when you created the new server, this is due to the spam, galsync, and anti-virus accounts which will lead to the number of accounts on the new server to be slightly higher than on the old one.
Once happy with what you see, login using a normal user account, and check to see if you can send emails to your domain, using the test server.
With all the above done, your users should be happy using your newly migrated server. The only thing they will find missing are their account signatures.
What you can do in this case is to make the old server available on a temporary sub-domain (old-webmail.domain.com), so that the users can log in to the old server, and essentially copy and paste their signature to the new server.
References:
- https://blog.johannfenech.com/migrating-opensource-zimbra-8-6-0-on-centos-6-8-to-zimbra-8-7-1-on-centos-7-safely-and-with-no-downtime/
- https://imanudin.net/2015/02/17/how-to-exportimport-filter-on-zimbra-mail-server/